Fonts
There are a lot of different things we can do with fonts, including changing their family and size.
Family
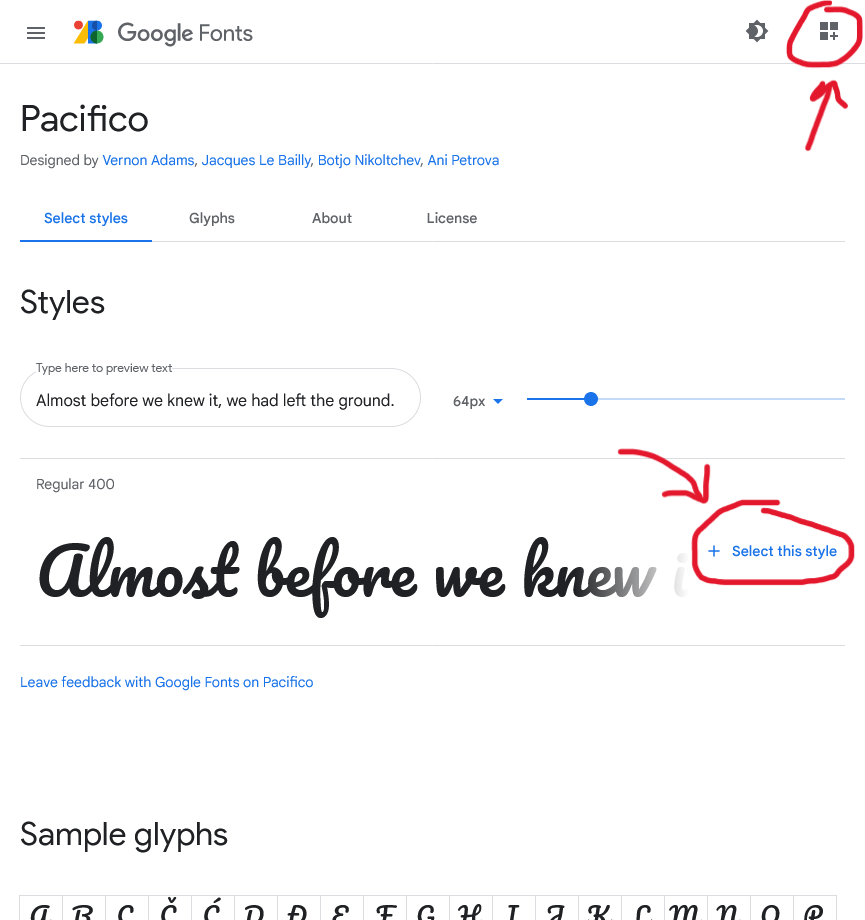
Head over to Google Fonts and pick out a font that you like.
Select that font then view all your selected fonts:
Select the @import option:
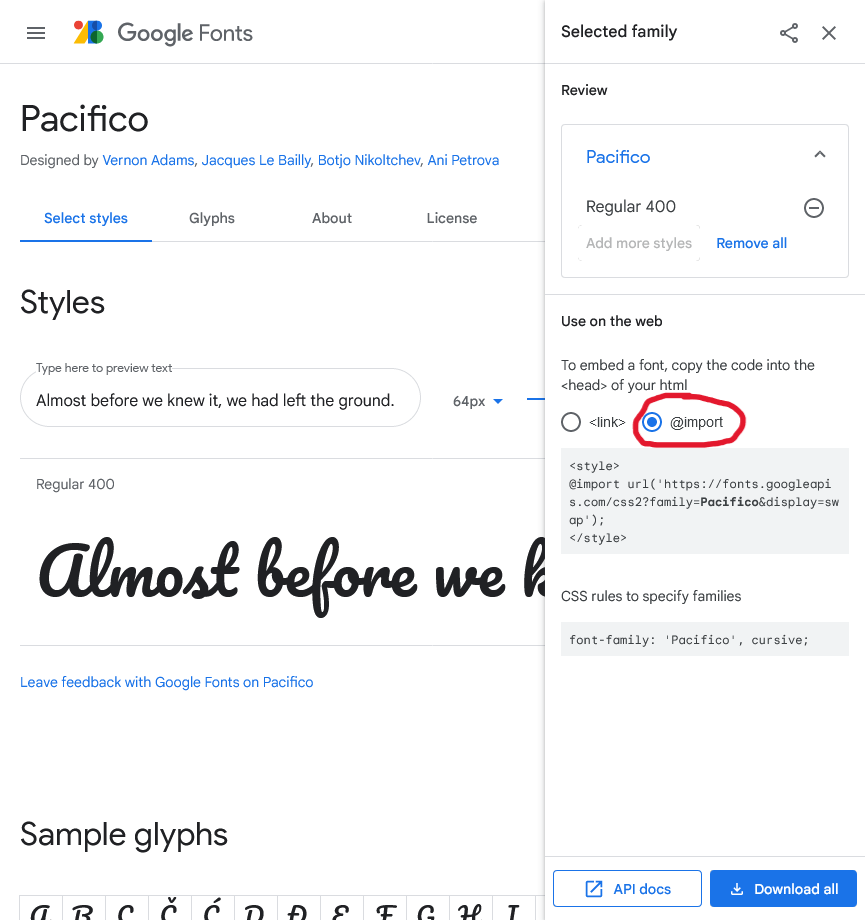
Copy the code between the <style> tags.
Paste this code at the top of your css file.
/* Your fonts here */
@import url('https://fonts.googleapis.com/css2?family=Pacifico&display=swap');
/* */
If you’ve noticed in our template, we’ve actually been making you use She Code’s signature font Raleway - but of course you’re free to change that since you have the power to now <3
Then head back to Google Fonts and copy the font-family line of code.
Let’s style our headings with your selected font:
/* Your CSS here */

h1 {
	font-family: 'Pacifico', cursive;
}

h2 {
	font-family: 'Pacifico', cursive;
}

h3 {
	font-family: 'Pacifico', cursive;
}
Challenge!
Find another font to use for the nav, footer and paragraphs.
Size
Let’s try changing the size of our text too.
Add the following to your CSS:
Before - Replace this code
/* Your CSS here */

h1 {
	font-family: 'Pacifico', cursive;

}
After - Updated code
/* Your CSS here */

h1 {
	font-family: 'Pacifico', cursive;
    font-size: 50px;
}
Challenge!
Change the font size of the h2, h3, and p tags.
Colour
We can change the color of our fonts using the color attribute.
Add the following to your CSS:
/* Your CSS here */

a {
	color: #ffa300;
}
Test
The colour of the a (link) tags in the nav should turn orange.
Challenge!
Change the colour of the h1, h2 and h3 headings.
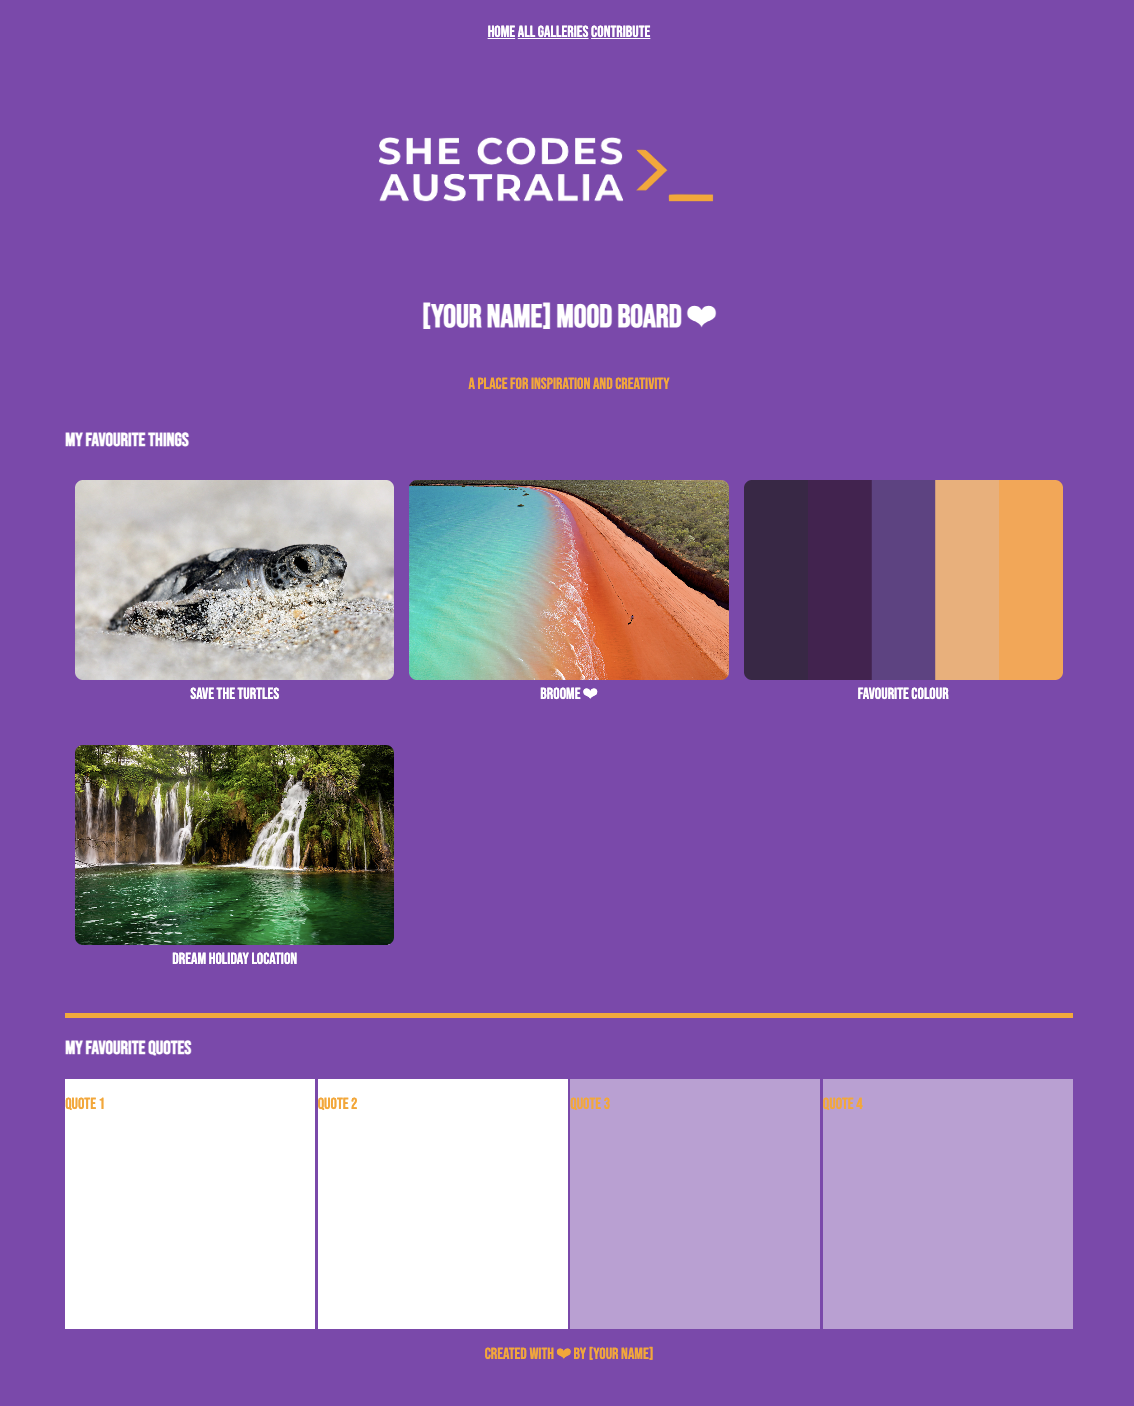
Here’s what your page could look like so far (using your own fonts). The following example uses Bebas Neue instead of Raleway:
This was She Code’s old font.
Kate, please don’t hate me <3
Fun Fact